

In this tutorial we take a look at how to build a dynamic Gutenberg block with a view script which uses attributes from the block and dynamic data generated using PHP. As an example we use the Blog archive on Findkit.com which has following features
- Dynamically exposes Post Categories as tag filters
- View Script uses those categories as Findkit UI Filters
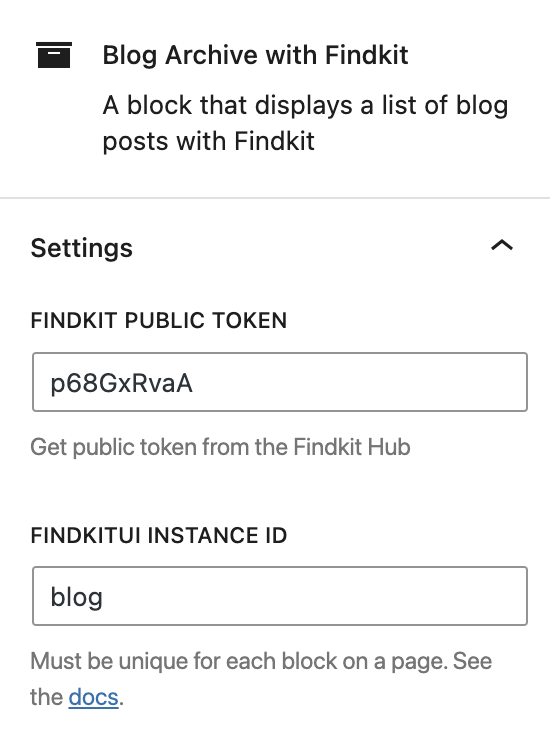
- The block can be configured in the Gutenberg editor
- The block can be added to the page multiple times with different configurations
To implement this we need to implement the block as a dynamic block so we can render it with PHP and read the current categories every time a page with the block is viewed.
Block definition
To start lets take a look at the block.json
{
    "$schema": "https://json.schemastore.org/block.json",
    "apiVersion": 2,
    "name": "findkit/blog-archive",
    "version": "0.1.0",
    "title": "Blog Archive with Findkit",
    "icon": "archive",
    "description": "A block that displays a list of blog posts with Findkit",
    "supports": {},
    "attributes": {
        👉 "publicToken": { "type": "string" }, 👈
        👉 "instanceId": { "type": "string" }   👈
    },
    "textdomain": "findkit",
    "viewScript": "file:view.js",
    "style": "file:view.css",
    "editorScript": "file:editor.js",
    "editorStyle": "file:editor.css",
 👉 "render": "file:render.php" 👈
}
To make it “dynamic” we add the "render": "file:render.php" field which renders the given php file when a page with the block is viewed. Also importantly we define the attributes without the source field so they get stored to the comment delimiter. We cannot store the attributes into the block content (attribute, text etc.) because we are dynamically rendering the block content on demand and not saving the block content into the post_content field on save. Eg. we use save() { return null } in the editor.js so there will be no saved content to read the attributes from.
Editing implementation
In the editor.js we import the block.json and use it to register the block
import metadata from "./block.json";
import { registerBlockType } from "@wordpress/blocks";

registerBlockType(metadata.name, {
    attributes: metadata.attributes,
    title: metadata.title,
    category: metadata.category,
    edit: Edit,
    save() {
        return null;
    },
});
In the Edit component we render the config options to the Gutenberg side bar:
import { useBlockProps, InspectorControls } from "@wordpress/block-editor";
import { TextControl, Panel, PanelBody, PanelRow } from "@wordpress/components";
import ServerSideRender from "@wordpress/server-side-render";


function Edit(props) {
  const blockBlocks = useBlockProps();

  return (
    <div {...blockBlocks}>
      <InspectorControls>
        <Panel>
          <PanelBody title="Settings" icon="more" initialOpen={true}>
            <PanelRow>
              <TextControl
                value={props.attributes.publicToken}
                onChange={(value) => {
                  props.setAttributes({
                    publicToken: value,
                  });
                }}
                label="Findkit Public Token"
                placeholer="The token here..."
                help="Get public token from the Findkit Hub"
              />
            </PanelRow>
            <PanelRow>{/* text control for instanceId */}</PanelRow>
          </PanelBody>
        </Panel>
      </InspectorControls>
      <ServerSideRender block={metadata.name} attributes={props.attributes} />
    </div>
  );
}
Note that we are bit lazy and just use the ServerSideRender block to render the block preview on the editor. This not really recommended by the Block Editor Handbook but it is much more maintainable and less work than the recommended way of implementing the block HTML twice (once in PHP and once in React).
Dynamic Rendering
In the render.php we render the HTML for the Block.
First we expose the attributes using the $attributes variable
<div class="findkit-blog-archive"
    data-public-token="<?php echo esc_attr($attributes["publicToken"] ?? ""); ?>"
    data-instance-id="<?php echo esc_attr($attributes["instanceId"] ?? ""); ?>"
>
Next we’ll render a search input
<input type="search" class="findkit-search-blog" placeholder="Search from the blog...">and a tag form which is populated using the blog categories which will be used to update the Findkit UI filters in the view script
 <form class="findkit-tag-form">
    <?php
    $categories = get_categories([ 'hide_empty' => true ]);

    foreach ($categories as $cat) :
        $id = "tag-$cat->term_id";
    ?>

    <input type="radio" name="tag" id="<?php echo esc_attr($id); ?>" value="<?php echo esc_attr($cat->slug); ?>">
    <label tabindex="0" class="findkit-tag" for="<?php echo esc_attr($id); ?> ">
        #<?php echo esc_html($cat->slug); ?>
    </label>

    <?php endforeach; ?>

    <input type="reset" class="findkit-tag" value="x" >
 </form>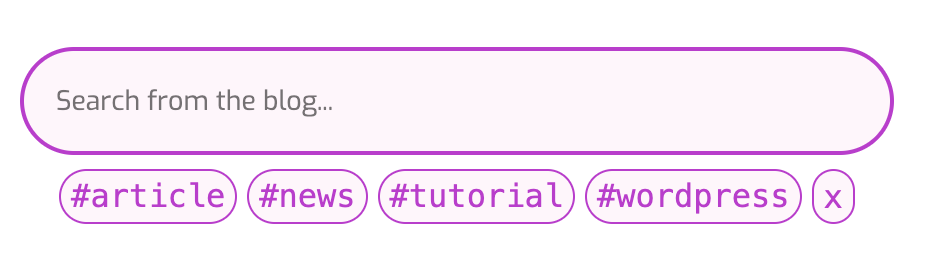
Finally we render a container for Findkit UI and close the initial findkit-blog-archive div element
    <div class="findkit-blog-archive-results"></div>
</div>
The View Script
Now in the view script we must initiate the Findkit UI for each instance of the Block. To do that we just loop through the container elements with the findkit-blog-archive class:
const containers = document.querySelectorAll(".findkit-blog-archive");
for (const container of (containers) {
    renderArchive(container);
}
and in the renderArchive() we read the data-attributes from the passed container and find the inner input, results and form elements:
function renderArchive(container) {
    const publicToken = container.dataset.publicToken;
    const instanceId = container.dataset.instanceId;

    const input = container.querySelector("input.findkit-search-blog");
    const resultsContainer = container.querySelector(".findkit-blog-archive-results");
    const form = container.querySelector("form.findkit-tag-form");
    // ...
}
It is paramount that we use the querySelector scoped on the container element and not the global document.querySelector in order to get the correct elements when there are multiple instances of the block.
Next lets create the Findkit UI instance. We use the @wordpress/scripts package to build the block the so we can install @findkit/ui from npm and import it directly
import { FindkitUI } from "@findkit/ui";

function renderArchive(container) {
    // ...

    const ui = new FindkitUI({
        instanceId,
        publicToken,
        minTerms: 0,
        container: resultsContainer,
        header: false,
        params: {
            filter: { tags: "wp_post_type/post" },
            sort: { created: { $order: "desc" } },
        },
    });

    ui.bindInput(input);
}
We disable the Findkit UI header containing the default search input since we created it manually using the render.php file and bind to that with .bindInput().
To listen the form changes we can use the native input and reset events on the form which are fired when user interacts with the form
// The Findkit plugin uses this prefix for the category tags
// in the index
const TAG_PREFIX = "wp_taxonomy/category/";

form.addEventListener("input", ()=> {
    searchWithTag();
});

form.addEventListener("reset", () => {
    // The "reset" events means the form "is going to
    // reset" so we must wait a bit to see empty form
    setTimeout(() => {
        searchWithTag();
    }, 1);
});

function searchWithTag() {
    // updateParams fires new search when the search params change
    ui.updateParams((params) => {
        const data = Object.fromEntries(new FormData(form));

        if (data.tag) {
            // If there is a tag selected on the form
            // limit the search results to ti
            params.filter.tags = TAG_PREFIX + data.tag;
        } else {
            // Otherwise show all blog posts
            params.filter.tags = "wp_post_type/post";
        }
    });
}
Aaand that’s it. I intentionally left bunch of Findkit specific stuff out of this tutorial so it could focus on Gutenberg side of things but do checkout the full blog archive implementation on Github:
The blog archive on Github is implemented as a WordPress plugin which can be used as is on any WordPress installation.
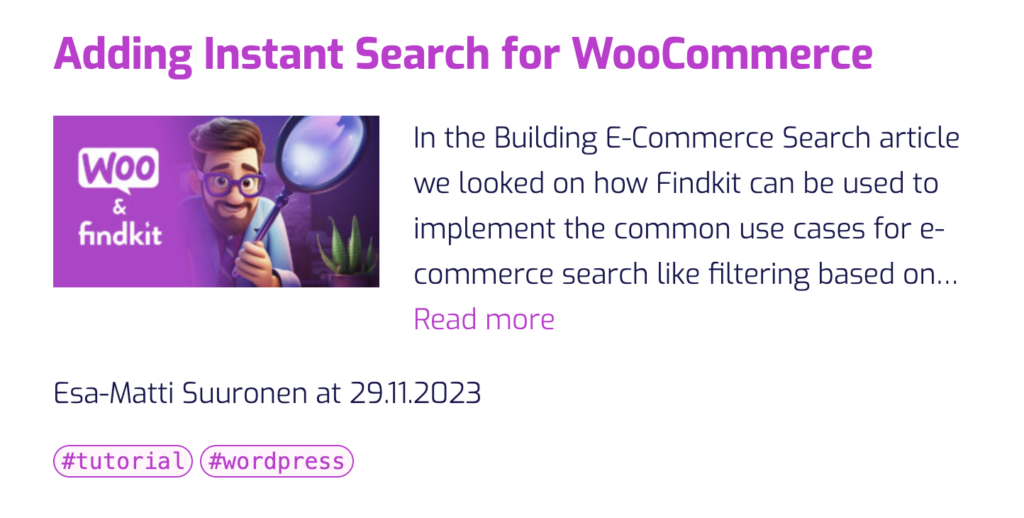
It builds on top of this tutorial and adds following features
- Linkable form state using Custom Router Data
- Custom Hit results with a featured image, excerpt and author information
- Sorts the blog posts by relevancy when search terms are entered
- Renders loading indicator on slow networks
- Renders error message on the Gutenberg editor
It also adds bunch of explaining comments so you can follow along the code.